Ok, with these unorthodox building materials it seems that you learn as you go: The mesh tubing wasn't working out quite the way I'd hoped. The bottles tended to shift inside the tube so that they wouldn't lay flat once they were moved. Also there were substantial gaps in between the top of one bottle and the bottom of the other. I needed something that would insulate better and that was easier to work with and construct. So I thought and experimented, thought some more and experimented some more, and finally I think I have it! The building process is as follows:
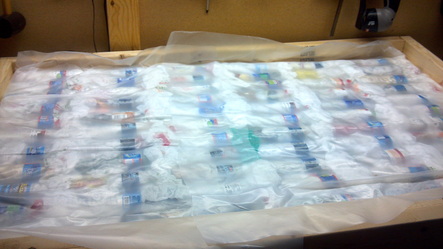
The picture below shows the bottles in the frame.
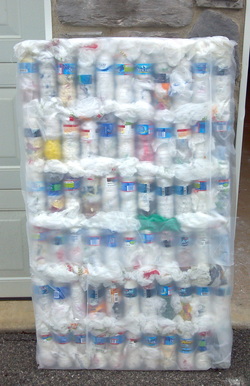
- I created a 4' x 2' 4" wooden frame to keep the bottles aligned while making an insulation panel.
- I lay a 3' x 8 1/2' sheet of 4 mil plastic sheeting in the bottom of the frame with the overlap hanging out.
- 66 bottles fit inside the frame and I use spray adhesive to stick them to the bottom plastic as I insert them.
- Plastic bags are stuffed between any gaps such as the gap around the cap of the bottles
- The tops of the bottles are sprayed with adhesive and then the sheeting is folded over, sealing the bottles within.
The picture below shows the bottles in the frame.
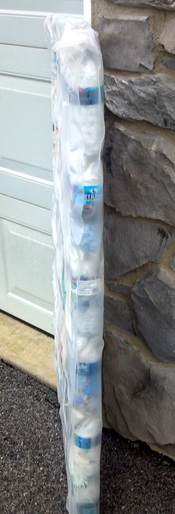
The resulting panels are uniform, light and easy to handle. They will be tied to the earthbags and then covered with either hardware cloth for plastering or an additional waterproofing layer. I also believe that these panels will be much better at insulating the walls than the mesh bags. Who knows though: I may be changing the plan again!
 RSS Feed